Getting to know the Pacific Assault MDK
To start my tutorial coverage of the Pacific Assault I thought we might want to cover the basic features of the MDK and make sure you have it setup correctly on your PC along with the game title is supports Medal of Honor Pacific Assault. I want to take time also to point you in the direction of the documentation that came with the MDK. My tutorial will be designed to complement that documentation. As the documentation that came with the MDK covers the main points, the tutorials that I will be working on should help break down those points and discuss them at a more granular level. With that introduction out of the way let’s get into the structure and proper setup of the MDK. What this tutorial will not cover will be some of the features within the MDK in detail. Those features will be covered in detail though several tutorials along the next couple of months.
Installation of the MDK
After you have downloaded the MDK where do you need to install it? What files or software do you need to install, to install and use the MDK? First, once you download the MDK (Here), you will notice that it comes with Microsoft .Net version 1.1 (dotnetfx.exe). Since the MDK was designed using .Net you need to make sure this is installed on your PC first. If you are not sure simply run the dotnetfx.exe that came with the MDK. With that out of the way we can start the install process of the MDK (For more information on .Net visit Here ).
To install the MDK run the file named MDKSetup.msi or Setup.Exe. It does not make a difference which you choose as both will end in the same result. The first screen that appears will require the location where you installed Pacific Assault. It will default to the default install location (C:\Program Files\EA Games\Medal of Honor Pacific Assault). If you have installed Pacific Assault in an alternative location simply type in that location. I have Pacific Assault installed in an alternative location so I simply input that location and click next. Next you will be asked where you want to install your MDK. Again it will default to the default install location (C:\Program Files\EA Games\Medal of Honor Pacific Assault\MDK\). I also will choose to install it in an alternative location so I simply type in the location I want. You also have the choice if you want other users to be able to run the MDK. Once you have made any necessary changes click next and next again though the screens that follow until the MDK begins to install. Once it completes click close and now you have the MDK fully installed.
Installation screens you will view during the installation process.
File Structure and Mod File Location
Let’s take some time to note important files and file locations the MDK will be using when you are creating mods. You should notice that a pk3 file has been added to your “main” folder. If you are familiar with Medal of Honor modding, this pk3 file named Pak20.pk3 is similar to the entdefs.pk3 the old Medal of Honor series used. It contains information that the Pacific Assault Radiant, also known as the Map Editor in the MDK, needs. In it you will find references to Quaked entities, model preview images, and the “common” textures (triggers, clips, ladders…).
NOTE: Pak20.pk3 is subject to change location as it interferes with joining a pure server. This will be fixed in the next release or patch
Now let’s go over the structure of where your mod content will live. If you browse to the following location you will see what the structure looks like; C:\Documents and Settings\[insert name here]\My Documents\EA Games\Medal of Honor Pacific Assault\ moddir. This location is NOT able to be modified unfortunately (Note: this was addressed at Mod Day as it should be a user controlled location yet in this version remains “fixed”). The moddir folder is where all the action will take place as far as the construction of a modification. You will note that the MDK comes with three samples and the usedmods.cfg file simply notes which mods are enabled.
Within each mod folder you will find the following structure: Map_source folder, Maps folder, Models folder, Terrain folder, Terrain_source folder, and a moddesc.xml file. Let’s take a few minutes to go over what each folder may contain and what the .xml file is used for.
The Map_Source folder contains the source .map file of your modification. The Maps folder should contain; the .bsp file of your compiled map, the .scr file used for your map, the .wld and .wdb files used for world information within your map. The Terrain folder should contain any .dds lightmap files used in connection with insets in your map and the .ter file that contains the heightmap information about your terrain. The Terrain_source should contain; the .alpha and .raw files that contain the source heightmap information about your terrain.
NOTE: Currently the MDK has a bug as to where it saves the .ter file and .dds files. This will be fixed in the next release or patch.
Then we have the .xml file that is different for each mod you create and lives in each mod folder. It consists of a description of the modification. In it you will find the author, location where one can download the mod, version, and it’s ID.
All of the folders and .xml file are created for you by the MDK. There is no need to have to figure this entirely out on your own but now you should have a basic understanding for what the folders and files are, how they are structured, and what they contain.
View of a mods folder and file structure that will produce a vaild Pacific Assault mod
MDK Features Overview
Now that we have covered the folders and files the MDK uses in mod creation lets go over briefly the features that are included within the MDK. Run the MOHPA Mod Developer’s Kit, also known as the Launcher which you already have installed, and take note of the core features known as the Mod Creation Tools as labeled by the tab. As I bring your attention to the tabs at the top, you will also notice that the MDK includes utilities, documentation, and an about section. We will go over each of these tabs and the features included within them one at a time.
Let’s go over the features within the “Mod Creation Tools” tab. Here we have features for setting up new mods, configuring mods, and testing your mod. We also find features for editing models, maps, and scripts.
The MDK's "main" screen
The “New Mod” feature is where one should start in creating a Pacific Assault modification. Here you can input an ID to quickly identify your mod, the name of your mod used in the mod browser in game, the author, a url if the mod has a location that is can be downloaded from, and the version number. Once that information is completed clicking next will bring you to a box where an in depth description can be filled in about your mod. After you complete your description and click next the New Mod wizard will show you where the mod folder will be created and clicking finish completes mod setup. You should now notice in the moddir folder your mods folder with the structure setup and ready for mod material.
The process of setting up a new Pacific Assault mod
The “Configure Mod” feature is where you can enable a mod, disable a mod, modify a mods description, and much more. The Configure Mod wizard will show you what mods you have in your moddir folder and a check beside it indicates that it is enabled. To enable a mod that is unchecked, click on it in the list of available mods and select enable. A small window will appear consisting of two options; priority and downloadable. The Priority option is simply used with multiple mods that are enabled. If for any reason there is a conflict between the mods you can set which will have priority over others. The downloadable option simply tells the server if this mod can be downloaded from the server directly. To disable a mod that is checked, click on it in the list of available mods and select disable. If you have pk3 files that are used in connection with your mod you can highlight the mod by clicking on it in the list of available mods and then select add pak files. Another small window will appear where the pk3 files can be selected and configured. In order for the pk3 files that need to be added with your mod to show in the select pak files window you will need to place them in your mods folder in the moddir folder. Once they are located in you mods folder, highlight your mod and then click add pak files. After you highlight the pk3 files you have two options as to how the server will handle the additional pk3 files. If you select client, it will be available to be downloaded from the server. If you select server, it will act as a server only pk3 file. If you have a mod that you need to modify its description you can do so by clicking on it in the list of available mods and select description. A window will appear that has all the same fields you used before to setup your mod. Now if you need to change something simply edit the information. The last area to cover of the Configure Mod section is the set current mod option. Once clicked, a small window will appear and you can select from the list of available mods, which mod is the current mod you’re working on.
Several features that will allow you to configure your mod during construction of it
The “Test Mod” feature can be used to test your mod without having to pak it and place it in the main folder. Note that before you test a mod you must enable it in the “Configure Mod” feature. Keep in mind also that this is really only for testing a custom map but skins, scripts, and/or models could be tested if they are tied to a custom map of some sort. Within the test mod wizard you can input the name of the bsp you want to test minus the .bsp extension and path of the bsp. Next choose the type of gameplay from the drop down list and a box is provided if you have any additional command line arguments. The last thing to do is select run game in order for Pacific Assault to be launched and go right to the mod you are testing.
Test your mod "within" the MDK with a few simple settings
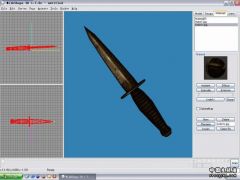
The “Model Editor” feature simply launches MilkShape 3D that comes unregistered with the MDK. How the MDK works with Milkshape 3D will be covered in other tutorials. For more information about MilkShape 3D please visit http://www.swissquake.ch/chumbalum-soft/.
The “Map Editor” feature simply launches the Pacific Assault Radiant. A small window will appear once the map editor feature is selected. This window will consist of available mods in the moddir folder. The nice part about this feature is that you can configure the radiant based off of the mod you are working on. How the MDK works with the Pacific Assault Radiant will be covered in other tutorials.
Let the MDK work for you by letting it set radiant settings based off of the mod not globally
The “Script Editor” is the last feature in the Mod Creation Tools tab and this is simply a text editor built into the MDK interface.
An easy text editor built into the MDK interface
One tab over from the Mod Creation Tools tab is the Utilities tab. Let’s go over the features within the “Utilities” tab. Here we have features for modifying/viewing rez files, pak files, decals, and textures. We will go over each of these features included within, one at a time.
Powerful utilities one tab away
The “Pak File Utility” feature simply launches Pakscape that comes with the MDK. Pakscape is a nice utility that can be used to create and modify compressed files. This works well when it comes time to pak your mod for distribution. How the MDK works with Pakscape will be covered in its own tutorial.
Very common file compression utility called Pakscape
The “Rez File Utility” feature simply launches a GUI that TKO made in connection with the Makepack.exe that comes with the MDK. Within this utility you can browse rez files and extract the contents. The contents will be extracted to the same location of the rez file.
Makepack.exe now in an easy to use GUI
The “Decal Tool” feature allows you to create you own decal materials. I will not go into depth on this utility as it’s fully covered in the documentation included with the MDK (…doc/art/creating_a_decal_material.htm).
Bring in artwork from Photoshop and create your own custom decal materials
The “Texture Utility” feature simply launches the DirectX Texture Tool. For more information about the DirectX Texture Tool please visit Here .
Open and save files in dds format
The last two tabs we will cover together. One tab over from the Utilities tab you find the Documentation tab and the About tab next to it. The Documentation tab breaks the documentation that came with the MDK into two sections and provides links to the official EA MDK forum and the Moh Mods section of the official EA site. The About tab contains those at EALA and TKO that have worked on the MDK project.
If you not sure about a topic or need to know who to contact check out these sections
Well, that covers the MDK overview. Hopefully using this information in connection with the “Getting Starting” guide TKO provided will give you a complete understanding of how the MDK and mods should be setup and ran in relation to Pacific Assault. This tutorial does not replace the “Getting Starting” guide TKO has produced but again simply breaks down the MDK in a more detailed overview and fills in some of the missing information.
Please Note:
Please do not link to the pictures within this tutorial. If you want to copy this tutorial for your website download the images to your host and simply give credit as follow:
Author: General Death
Site: www.modtheater.com


